top categories
Productivity + Time Management
Handmade Shop Foundations
Marketing, Traffic + Sales
top picks
Download the step-by-step Maker’s Roadmap
Grab the Handmade Pricing Calculator
join
the free
facebook group
Buy the planner
access the full library of resources for makers
Handmade Product Photography: Getting Started Guide
July 27, 2021
It’s common knowledge that making good quality handmade products is necessary for your handmade business to succeed. . .
. . . but, turns out, it is just as important to have top-quality product photos as well!
If your product photos look amateur-ish or poor quality – in other words, average – it will directly affect your conversion rate aka your sales.
Bad photos also affect your brand image — which can impact how much customers are willing to spend on your products, which in turn can really eat away at your profit margins—YIKES!
With smartphones that take great pictures and cameras that are more and more affordable, average product photos simply aren’t enough anymore – only one problem: it can be pretty daunting to get started if you have zero experience in photography.
What do you need? Where do you start?
It’s absolutely doable to learn how to take product photos that look professional—so today I’m going to go through all the information you need to know in order to take top-quality photos that will make your shop and products stand out.
Let’s dive in!
Should I Hire A Product Photographer?
Before we talk about how to take photos and what you’ll need, the first decision you need to make is if you want to take photos yourself, or if you prefer to hire a professional photographer instead.
Working with a product photographer offers some obvious advantages.
- First—and this is a big one—is their expertise. The right photographer is already an expert at taking professional looking product photos that really make your products look exceptional.
- Second, of course, is time. Learning to take good quality product photos takes time, and taking photos of every new product takes time as well.
The obvious disadvantage to this option is cost, and that just depends on the funding you have available to hire out a job like this.
If you decide that you want to give it a go and try it yourself, read on to learn how to take product photos!
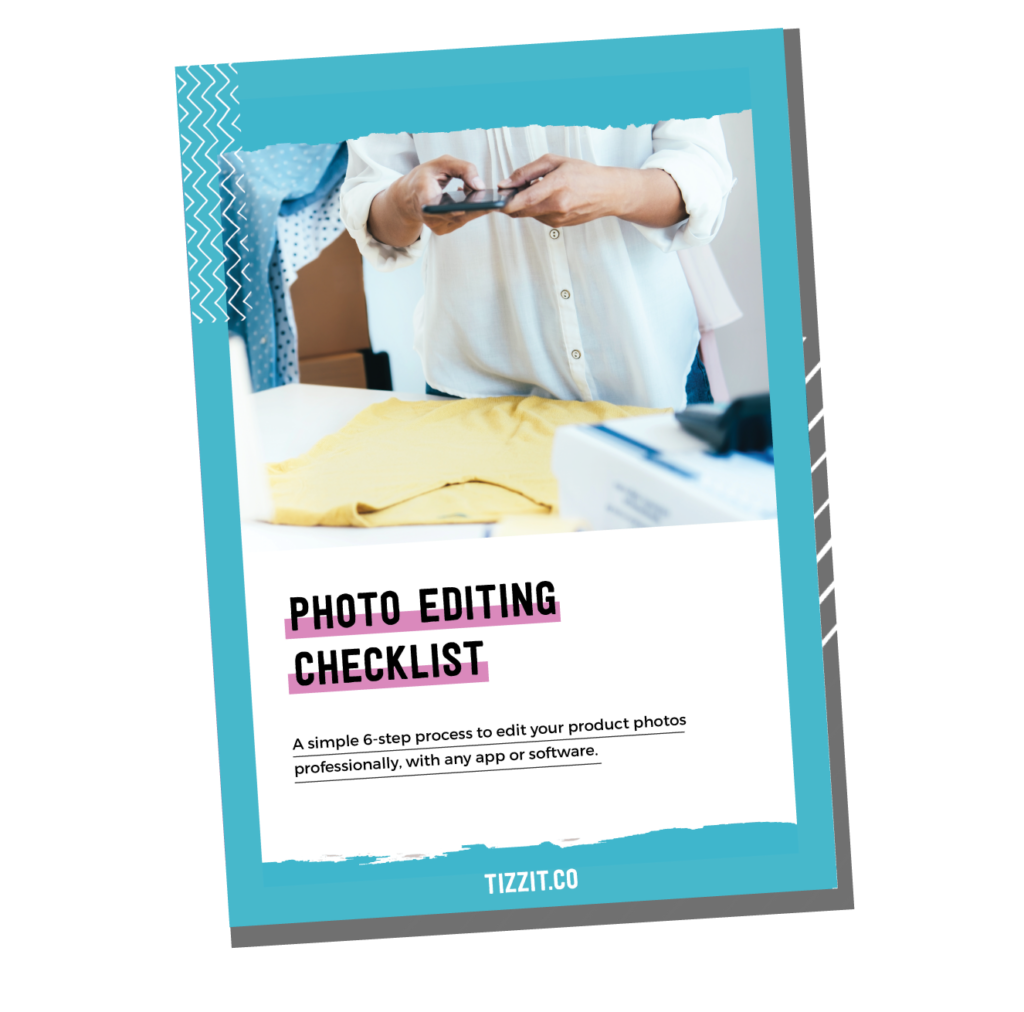
Grab this free product photo editing checklist!
follow this easy 6-step process to edit your handmade product photos like a pro.
How To Take Product Photos
For many of you, hiring a photographer may not be in the budget, and that’s fair enough – or you may enjoy taking your own photos!
First off, I want to tell you that it is absolutely doable to take your own high quality, professional-looking product photos!
Don’t be intimidated by doing this yourself, it just takes the right equipment and some up-front time investment to learn and practice. But once you know how to do it, it becomes much quicker and yes, can even be a lot of fun!
Product Photography Supplies For Your Home Studio
Let’s start by walking through the equipment you’ll need to take beautiful, impressive photos of your products.
There are 4 things needed for your home studio:
- A camera
- A source of light
- A nice background
- An editing software
1. Camera
You have two options here:
Option 1: Your smartphone
The first is your smartphone if it is fairly recent and has a good camera – if you are really short regarding budget, this is a viable option. It won’t give you as much flexibility as a DSLR camera or mirrorless camera would, but it can absolutely be enough.
If you go the smartphone route, I would suggest you do a quick search to see if your smartphone allows for “manual” or “professional” mode – and if it doesn’t… for apps you can download that actually allow to enable “manual” settings when you use your phone camera, meaning that instead of just automatically picking the settings for you, you have more control over those and can use your phone almost like a “real” camera, adjusting things like shutter speed, aperture, etc. (which I’ll talk more about in a sec)
Option 2: A DSLR or Mirrorless camera aka a “real” camera
The second option is, as I just mentioned, a DSLR or mirrorless camera: aka what we think of when we think “camera.”
When you start looking at cameras you will see aaaaaaall the latest models—that are really expensive! And you might feel like you need to get the most current model because you don’t know exactly what features you need for the best product shot and so the safe choice is the latest one right?.
This is what most brands will tap into as well: making you feel like if you don’t buy the latest model you won’t get very far with your pictures, that the camera would be too old to take good product shots.
But the truth is that you don’t need to go out and buy a super expensive brand new camera—even a 5 year old camera body will do just fine. Just make sure you buy a reputable brand, like Canon, Nikon, Sony, etc.
If you really want to spend money – I’d much prefer you spend it on a good lens for your camera or a second lens but honestly that’s a bit more down the track once you’ve got a bit more experience – not at all necessary to get started. Save your pennies.
Once You Choose/Buy Your Camera . . . Now What?
Now once you have a camera – you’re going to hold it in your hands and go … whaaaat do I do with this?
There’s a ton of options and buttons and menus and things to click on and it can feel pretty daunting.
My advice is this:
Before you start taking pictures, take the time (I know this is going to sound boring but trust me on this) to watch an online tutorial for your specific camera model and learn how to change the settings and navigate your camera menu. You will only need to do it once but if you try and get comfortable with the settings as you’re also trying to learn how to take pictures, you will quickly become overwhelmed and feel like it’s too hard.
My second tip here is realizing that you don’t need to understand more than a few things to take really good pictures. You don’t need to understand how to use all your camera features – like at all.
In fact there are 4 main concepts you need to understand to really master your product photos:

Once you learn how to adjust these things, you are on your way to taking absolutely stunning product photos.
I will link below to my favorite tutorials EVER on this, they are from another Youtube channel called Apalapse, only 5 min long each and SUPER simple and clear. You’ll feel like a pro in no time at all after watching them. But stay with me before you watch those as we’ve got a few more things to cover.
For YouTube links and blog, my fav tutorials:
So – last tip when it comes to mastering your camera is to spend an afternoon taking pictures with your camera – without aiming to take good pictures. Bonus if you do..! but it’s really about taking an afternoon to play around with your camera. Experiment with different camera settings to get comfortable with how each setting affects your photos. Pure learning. It feels much less daunting that if you set the bar at “I must take great pictures for my products by tonight” and it’s your first time using your camera – just plan to write off a half day to just have fun and give yourself that space to learn.
Lighting, Backdrops, and Editing Software
Now that you’ve completed step 1 and chosen your camera— and you had a fun day taking practice photos and learning which buttons control what, let’s talk about the product photography setup you need in order to make your photos (and your products!) look top-notch!
2. Good Lighting
Lighting is a critical aspect of good photography: if you don’t have good lighting, you won’t get a good shot no matter how fancy your camera is or what settings you use!
There are 2 types of light you can use:
Natural vs. Artificial Lighting
Let’s start with natural night.
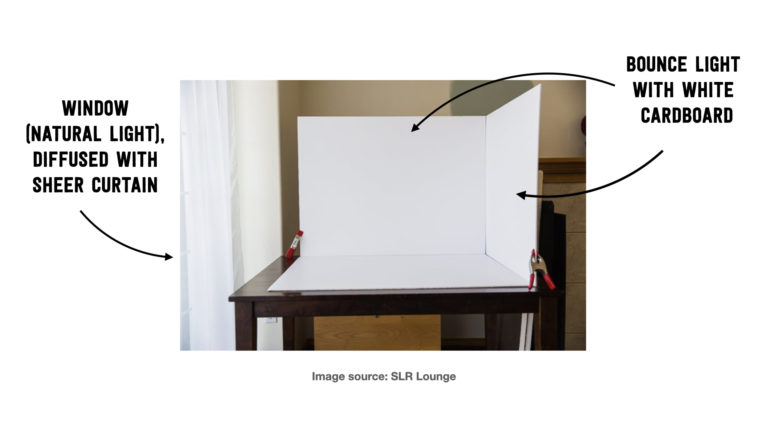
Natural light, when done well – will give you the most natural looking pictures and beautiful results because it has a natural/neutral color tone. If you have a big window, a table you can put in front of it, and some white cardboard to bounce the light and get rid of hard shadows, this can be a great setup for your photos.
The disadvantage of natural light is that you might not have the perfect conditions for it: maybe you don’t have the perfect window in a perfect spot or the weather may be too cloudy or too sunny on the day you plan to take photos.
In other words, natural light is free and can be wonderful but it also is by definition much harder to control and can change quite quickly. If you need to do a shoot over a couple of days and the weather changes for example… the light in your photos will be different too, making it hard to take consistent shots.
For this reason – I am starting to recommend more and more that using artificial lighting with the right equipment is easier, especially if you are just starting out.
The main advantage of artificial light is that you can control your environment: weather and time of the day… they really don’t matter – you can recreate the exact same light at any time on any day. This is convenient when you need to work late for example or on days when the weather isn’t collaborating – and it also removes the pressure of working fast to take advantage of the natural night before it changes.
You can buy a set of 2 light boxes or 2 umbrella lights at a reasonable price on Amazon that will set you up for successful photos. The ones I am using right now cost me about $50 Australian dollars.
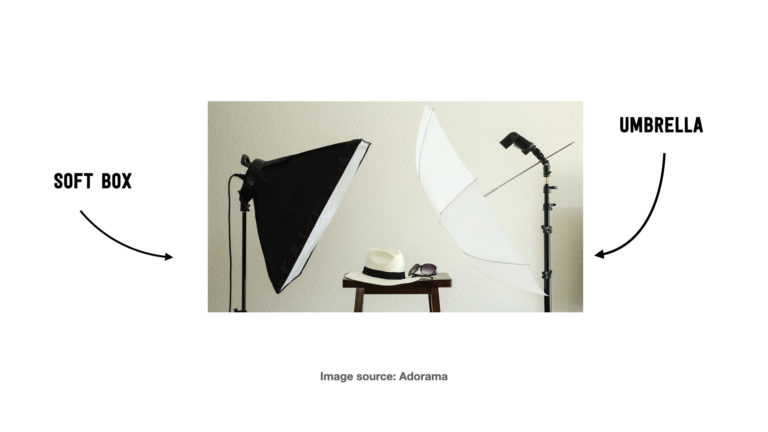
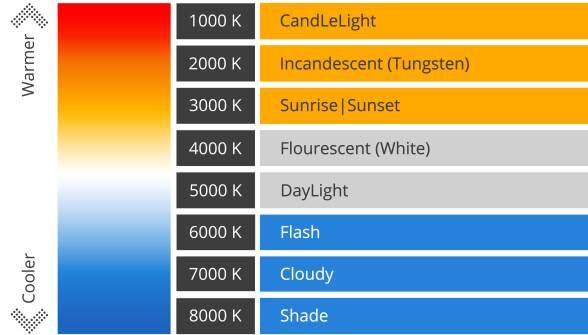
The most important thing if you use artificial light is to use the right light bulb so that your pictures don’t look too cold or blue or too warm or yellow.
To replicate the neutral look of natural light with a light bulb, look for light bulbs with a Kelvin temperature of 5000K.
Kelvin Temperature Reading
Kelvin (K) is a unit used to describe the color temperature of a light bulb. Lower numbers mean warmer/softer light, middle numbers are a neutral white light, higher numbers are a cooler/bluer light.
When you buy a light bulb it will have the Kelvin temperature stamped on it, look for a number followed by a “K” stamped on the bulb. Make sure yours reads 5000K.
Direct vs. Indirect Lighting
Whether you decide to use natural or artificial light, what’s important to understand is the difference between direct vs. indirect lighting.
Direct light means that the light (natural or not) hits your product directly, without being reflected, bounced, or filtered— it will cast hard shadows on your objects. Examples of this would be when the sun rays hit your products directly, or light from a light bulb that’s not filtered through an umbrella or a soft box shines on your product.
Indirect light means that the light isn’t hitting your products directly similar to what it would be like in the shade. You create indirect light by using a reflector to bounce the light back to your object like white foam boards for example, or diffusing direct light through a soft box or umbrella.
If you are just starting, you will want to use indirect lighting for your product photos. Working with direct light is very tricky and although you might see some shops playing with hard shadows and direct sun rays, this is certainly not the norm, nor easy to do – so sticking to indirect light is absolutely the best move here.
3. Creating A Professional Photo Background
- Solid background
Most of the advice you will find out there will tell you that you need to have a white photo backdrop and then walk you through how to take pictures with a white background.
It’s true that in some cases it’s nice to have, but you can also break out of that rule and experiment with other colors as long as they work with your brand and are a nice contrast with the product you are photographing.
For example, if you think your product would look really good on a blue background, or you think a pink background is a great tie-in to your brand, definitely experiment with it and give it a try!
The most important thing to remember about your background is to make it seamless, which means no seams—or lines—are visible in the photo . . . that way viewers don’t notice the background.
The easiest way to get a seamless background is by using a single sheet of paper, or a paper sweep.
A paper sweep is created by taking a large roll of paper, elevating it and attaching it to some type of holder (like an easel), then letting it drop down and “sweep” forward onto a flat surface to create a backdrop with no creasing.
If your product is smaller you may not need a “sweep,” you can just use a piece of cardboard or sturdy paper.
Lifestyle Product Photography
Something else you might want to experiment with is called “lifestyle product photography.”
Lifestyle backgrounds are things like wood, tile . . . basically a more textured backdrop. You can buy the real thing (or use extra that you have around the house), or you can actually buy backdrops like this online— just make sure that they are nice quality and look “real,” because of course you don’t want to have your backdrop look fake or tacky.
Be creative, this is a great way to add a little texture to your picture if it complements your product.
You will have to experiment to see what backdrops work well, and I always recommend that you ask for constructive feedback because as with everything, other people will notice things that you don’t and you will end up with a better end product.
Where do you get constructive feedback??
If you’re a Tizzit HQ member, post your photos in the community forums and you will get awesome feedback from myself and the other community members—you will be amazed and grateful at all the small details they will think of to help your product photos look top-notch!
And if you aren’t a Tizzit HQ member yet, this is another great reason to come on over and check it out!
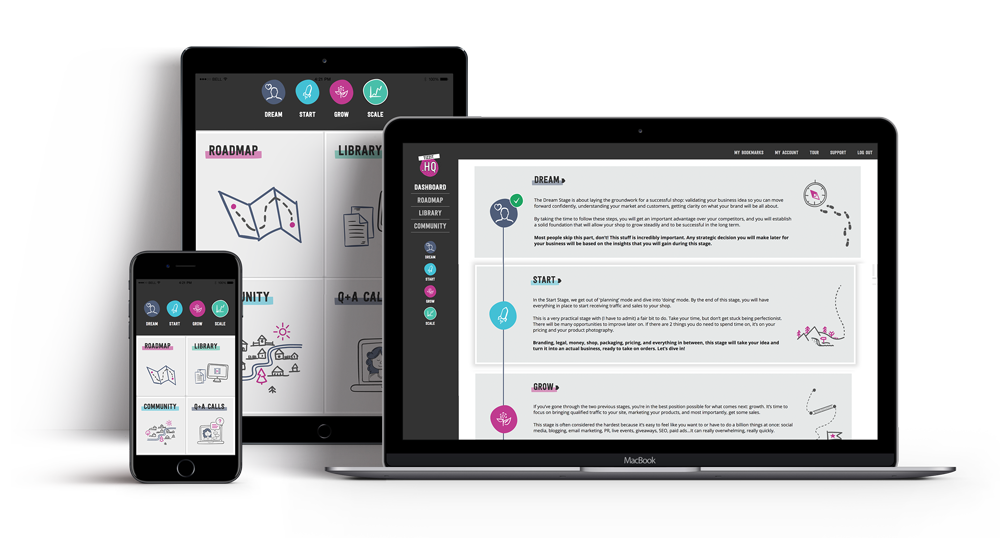
BECOME A TIZZIT HQ MEMBER AND TURN THE HOBBY YOU LOVE INTO INCOME YOU’LL ADORE
- 4-STEP MAKER'S ROADMAP SYSTEM
- LIBRARY OF IN-DEPTH COURSES AND TRAINING
- LIVE MONTHLY COACHING SESSIONS
- 24/7 ACCESS TO AN EXCLUSIVE AND SUPPORTIVE ONLINE COMMUNITY
4. Editing Apps & Software
Using a good photo editing app and software not only will help you make your pictures look better, but will save you boatloads of time as well.
Photo apps not only allow you to touch up your pictures, but also to export them in the dimensions that your platform requires.
My top picks are Lightroom CC for a desktop computer and Snapseed for your mobile. . .
. . . But I would really recommend reading this article about choosing the best photo app— it covers even more photo editing options and talks about the pros and cons of each one.
Speaking of editing…
I also have an article that shows you my simple 6 step product photography workflow so you can learn how to edit your photos quickly and efficiently, including a free photography workflow checklist!
Avoid Common Mistakes
There are a number of common mistakes that people make when shooting photos of their handmade products— bad lighting, wrong color balance, weird angles, and more—too many for me to cover in this article.
I actually brought in a professional photographer to share her expertise inside Tizzit HQ about 10 common photography mistakes that handmade shops should avoid.
These mistakes are quite easy to avoid once you know about them, it’s all a matter of learning what to do or not do so they don’t happen.
Embrace The Learning Curve
So of allllllllllllllllll the things I’m telling you about product photography today, this is the one I want you to pay extra special attention to:
Triple . . . yes, triple!!! . . . the time you think it will take you if you are just getting started.
This won’t be the case forever – but if you’re new to taking photos, and you think your project will take you 2 hours, plan for 6 hours.
It may sound cliche, but you need to embrace the learning curve.
It’s going to take trial and error and at first you might feel really frustrated or discouraged when you look at your photos and they aren’t very good—but trust me when I say that this is totally normal and it’s the best way to learn photography.
If you’re new to taking product photos, schedule three days instead of one. Give yourself time to try different settings and get your photos looking just the way you want without feeling stressed about a deadline.
Have some fun with it—it’s like learning to ride a bicycle. When the picture doesn’t turn out like you want it, give it another try; over time it will get easier.
Once you know how it works and have figured out the settings that work best, it will become very quick and easy to take your pictures and you will become very good at it!
Product photos are so SO important for online shopping that you can’t settle for average, so persevere and take the time to learn how to take GREAT photos!
Ready To Take Your Own Product Photos?
Now that you know all the ins and outs of how to take product photos, you are ready to get started—have some fun, experiment, and you will do a fabulous job!
Remember that the time and money you invest in good product photos—whether buying the proper equipment or paying a professional product photographer— are SO worth it because they will have a direct impact on your sales!
Better Product Photos => More Sales!
Once you master the process of taking great product photos, all that’s left to learn is how to enhance your photos and edit out any tiny imperfections. . .
. . . so your next step is to go and read this article detailing my 6 step product photography workflow for easy handmade product photo editing —it includes a FREE photography workflow checklist to use as you edit your photos!
Thanks for reading and until next time, au revoir!
Get your hands on this free A to Z guide to starting and growing a successful handmade shop. Know what to do (and in what order) to build a wildly successful handmade shop.
download now
DOWNLOAD THE MAKER’S ROADMAP
Get your hands on this free A to Z guide to starting and growing a successful handmade shop. Know what to do (and in what order) to build a wildly successful handmade shop.
download now
DOWNLOAD THE MAKER’S ROADMAP
Leave a Reply Cancel reply
Get started right now with our free library
of resources for makers + handmade shop owners
Sign up below and get instant access to a collection of FREE practical guides, workbooks, and checklists that will help you start, grow and profit from your handmade shop. (without pulling your hair out!).
yes, free resources please!
@tizzitco
disclaimer
subscribe to youtube
become a member
get in touch
We acknowledge and give thanks to the Budawang and Yuin people, the Traditional Owners of the land we work and live on. We pay our respects to all Aboriginal and Torres Strait Islander Peoples and elders past, present and emerging.
Join Tizzit HQ
4-step Maker’s Roadmap System
Library of In-Depth Courses and Training
Live Monthly Coaching Sessions
A Supportive Online Community
Click To Get started
close x
get instant access to
the maker's roadmap
close
We hate spam too. Unsubscribe at any time.
get instant access to the free resource library
close
We hate spam too. Unsubscribe at any time.
get instant access to the free pricing calculator
close
We hate spam too. Unsubscribe at any time.

